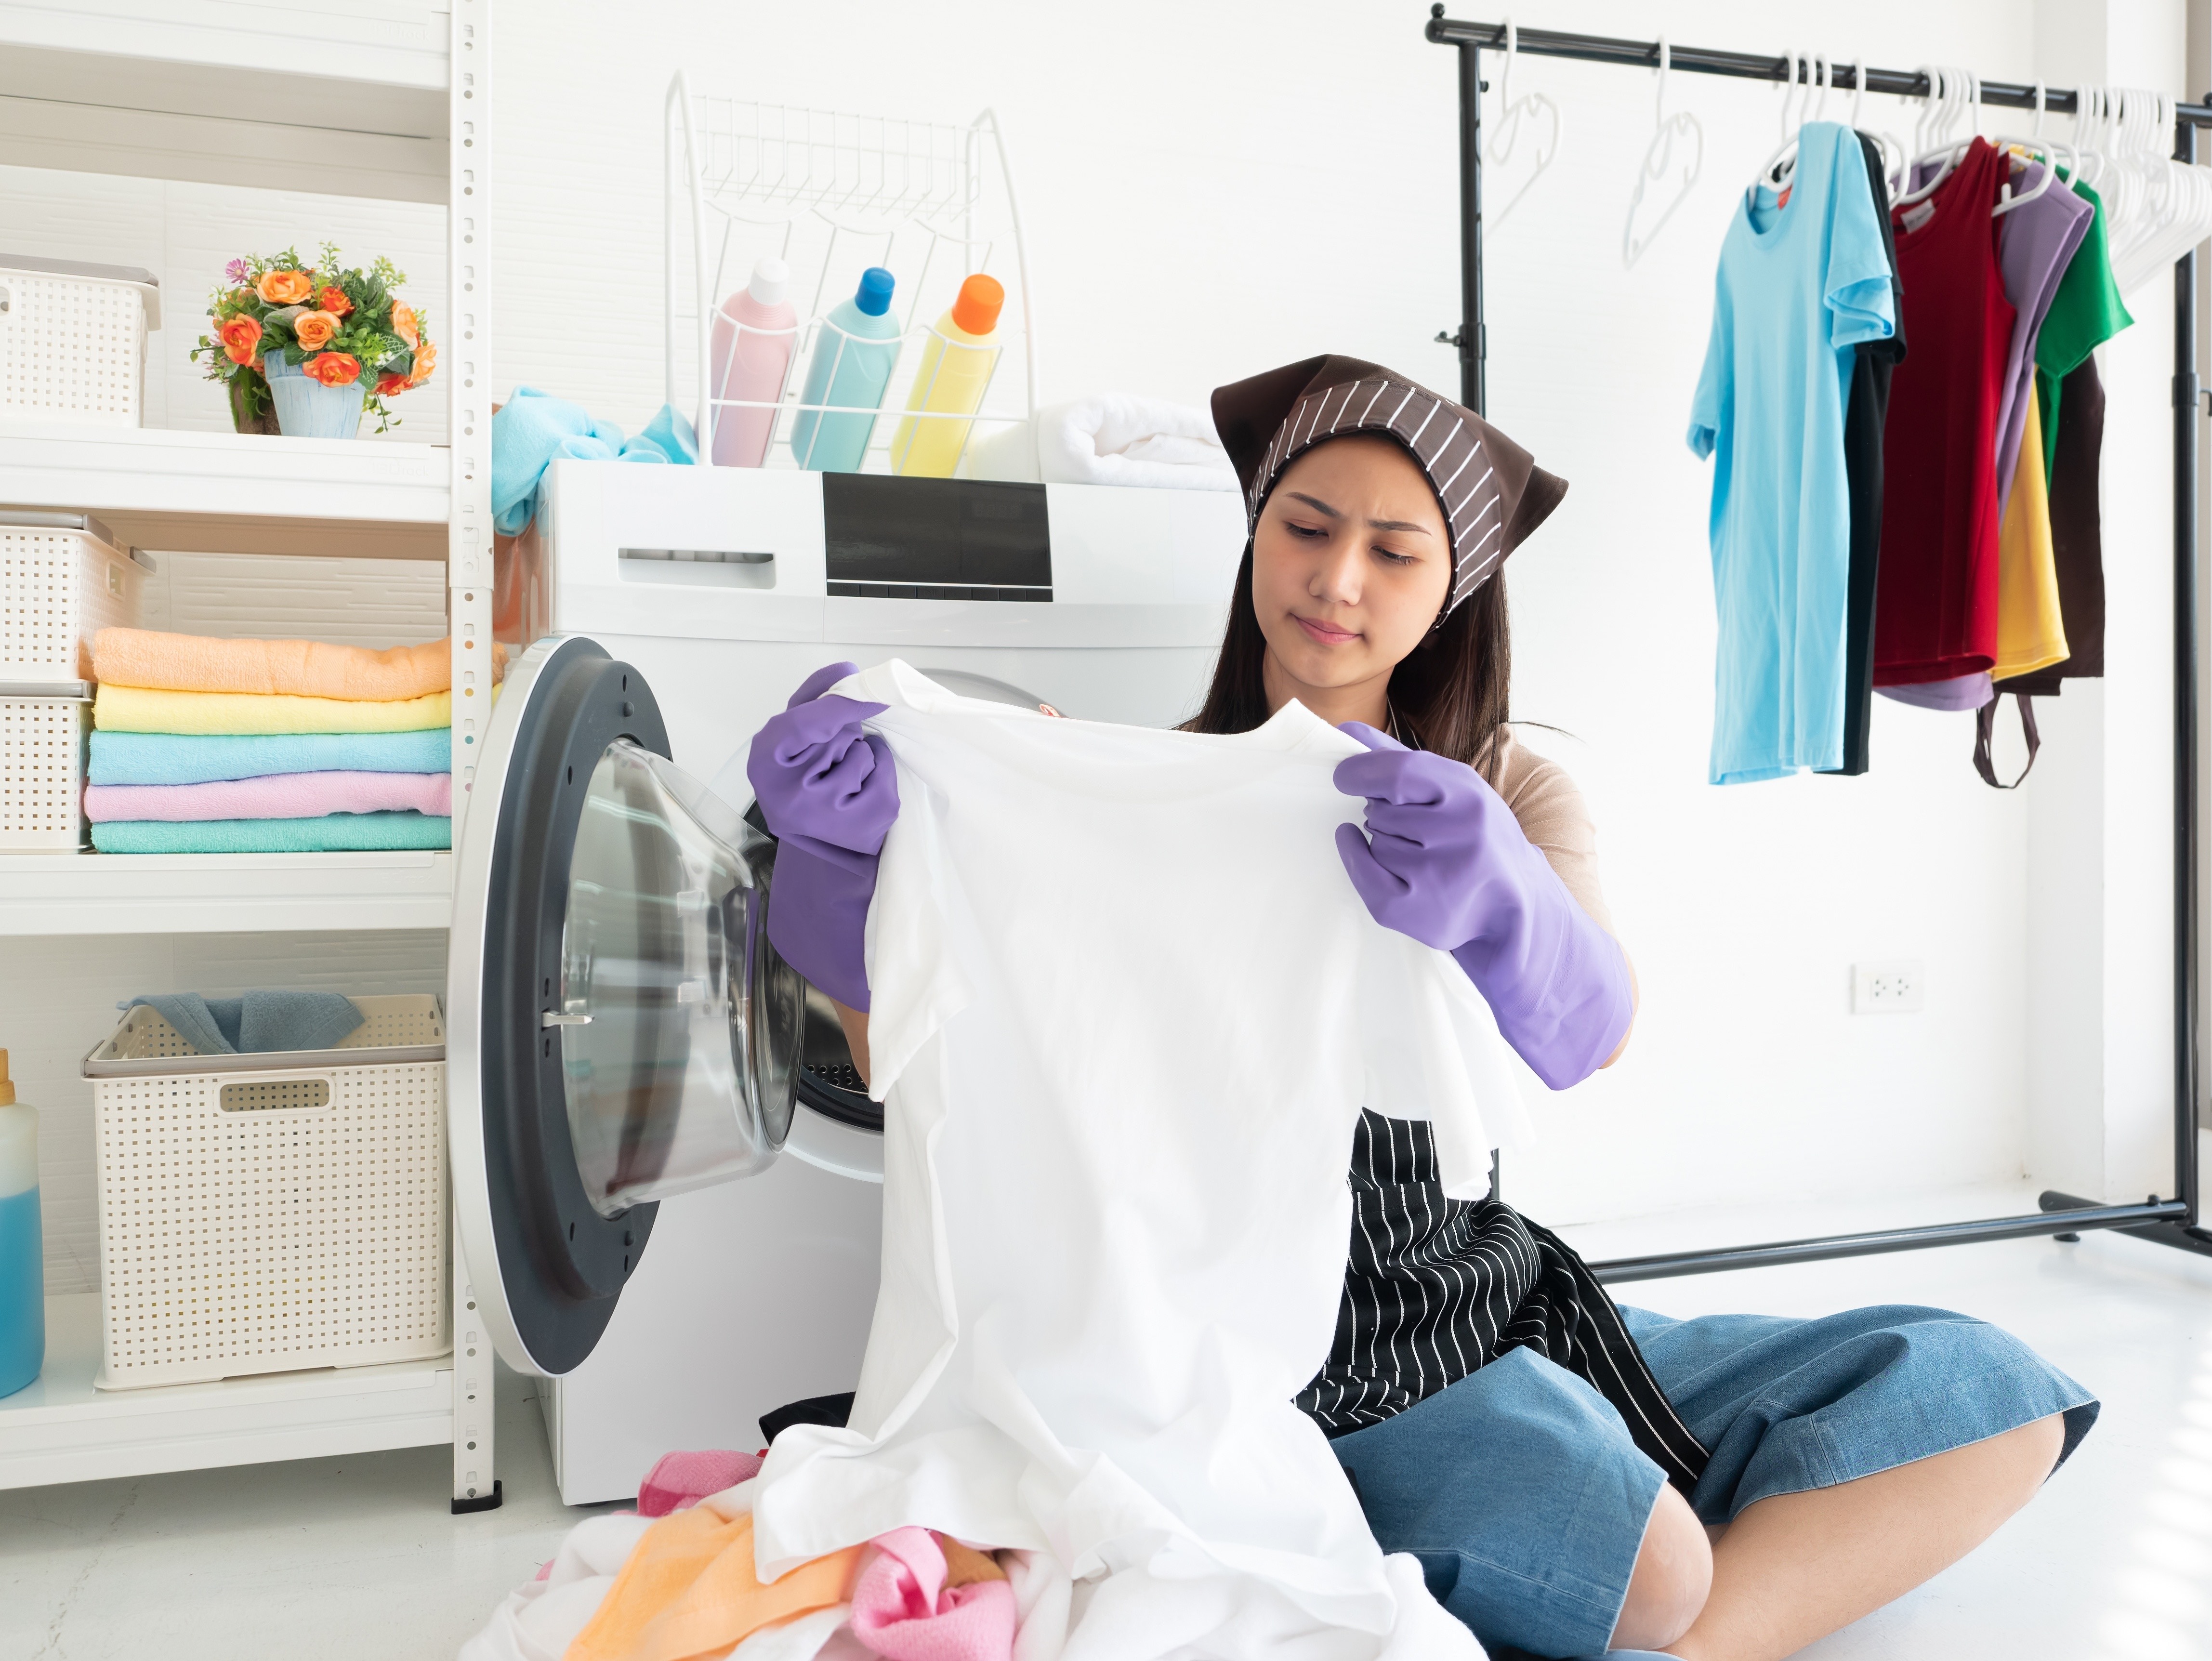
Stain Removal 101: A Comprehensive Guide to Treating Common Stains
Introduction to the Stain Removal GuideUnderstanding Stains
General Principles of Stain Removal
Specific Stain Removal Techniques
Professional Stain Removal
Preventing Stains
Stain Removal for Special Materials
Conclusion
Appendix A: Quick Stain Removal Chart
Appendix B: DIY Stain Removal Solutions
Introduction to the Stain Removal Guide
Welcome to "Stain Removal 101: A Comprehensive Guide to Treating Common Stains". This comprehensive guide aims to equip you with the knowledge and confidence to tackle all types of stains – from red wine and coffee to ink and motor oil. Understanding how to effectively remove stains can save your favorite clothing items, keep your upholstery looking fresh, and even protect your wallet from costly replacement or professional cleaning fees.
Stains can be intimidating. We've all had that sinking feeling when a cup of coffee topples over onto a pristine white shirt, or when a pen leaks into a pocket and ruins a pair of jeans. The good news is, most stains aren't as permanent as they seem, and with the right approach, you can restore your items to their original condition. The key is acting quickly, using the right method, and having patience.
Why is Stain Removal Important?
Stains are not just visually unappealing, they can also degrade the quality of your fabrics. They can cause discoloration, weaken fabric strength, and result in unpleasant odors. Over time, untreated stains can set and become much harder to remove. Therefore, prompt and proper stain removal is crucial to preserving the lifespan and appearance of your items.
Factors Affecting Stain Removal
Successfully removing a stain involves more than just scrubbing it with soap and water. There are several factors that can influence how easy or difficult it is to remove a stain, including the type of stain, the fabric on which it has landed, and the age of the stain. By understanding these factors and how they interact, you can significantly improve your success in stain removal.
- Type of Fabric: Different materials respond differently to stain removal treatments. Delicate fabrics like silk or wool require gentle methods, while durable materials like cotton or denim can withstand more vigorous treatment. Some fabrics may also be prone to discoloration with certain stain removers, so it's always best to do a spot test first.
- Age of the Stain: Fresh stains are usually easier to remove than old ones. As a stain sits, it penetrates deeper into the fibers and can become set by heat or time. This doesn't mean that old stains can't be removed, but they might require more effort or specialized techniques.
- Type of Stain: Stains can be broadly classified into categories such as protein, tannin, oil, and dye stains. Each type of stain has a different chemical makeup and therefore requires a different removal strategy. Identifying the type of stain you're dealing with is the first step to choosing the right removal method.
In the upcoming chapters, we'll delve deeper into these factors and offer step-by-step instructions for treating a wide variety of common stains. Whether you're a seasoned laundry expert looking to broaden your knowledge, or a stain removal novice hoping to salvage a stained garment, this guide is designed to help you navigate the sometimes tricky waters of stain removal. Ready to get started? Let's dive in!
Understanding Stains
Before we dive into the specifics of stain removal, it's essential to understand what stains are, why they occur, and why they can be challenging to remove. This knowledge will equip you with the foundational information necessary to effectively deal with all types of stains. By the end of this chapter, you'll have a better grasp of the science behind stains, how different types of stains interact with various materials, and why some stains are tougher to remove than others.
At first glance, a stain might seem like a simple problem. Something spills on your shirt, it leaves a mark, and you need to clean it up. But there's more to stains than meets the eye. At a molecular level, a stain is a result of a substance bonding with the material of your garment, a process influenced by the chemical properties of both the staining substance and the fabric. Different types of stains adhere to materials in different ways, requiring unique strategies for removal.
In this chapter, we'll explore the science behind stains and delve into the characteristics of different types of stains. We'll discuss how various fabrics react with stains and why certain fabrics are more stain-resistant than others. We'll also discuss the role of heat, time, and agitation in the stain setting process, which will provide critical insights for the stain removal techniques outlined in subsequent chapters. Ready to delve into the world of stains? Let's get started.
The Science Behind Stains
Understanding the science behind stains is key to successful stain removal. A stain occurs when a substance comes into contact with a material and bonds to its fibers at a molecular level. This bonding process is influenced by various factors, including the characteristics of the staining substance, the type of material being stained, and the conditions under which the staining occurs.
What are Stains at a Molecular Level?
At a molecular level, stains are composed of tiny particles of a substance that adhere to a material. This adhesion can be caused by different types of molecular bonds. For instance, ionic bonds can occur between charged particles in the staining substance and the material. Other types of bonds, such as covalent bonds, involve the sharing of electron pairs between atoms. Understanding these interactions can help us figure out how to break these bonds and remove the stain.
How Do Stains Interact with Different Materials?
Stains interact differently with various materials based on the physical and chemical properties of both the stain and the material. For example, a stain that is acidic may bond more easily with a material that is basic, and vice versa. Similarly, oil-based stains tend to adhere more strongly to synthetic fabrics, which are often made from petroleum products, than to natural fabrics like cotton or silk. These differences in stain-material interactions make some stains easier to remove from certain materials than others.
The Role of Solvents in Stain Removal
Solvents play a critical role in the process of stain removal. A solvent is a substance that can dissolve other substances. In the context of stain removal, solvents work by dissolving the staining substance, breaking the bonds between the stain and the material, and allowing the stain to be washed away. The choice of solvent is essential and depends on the type of stain. For instance, water is an effective solvent for many common stains, but oil-based stains require an organic solvent.
In the following sections, we'll explore the different types of stains and their characteristics, how they interact with different materials, and how understanding these interactions can aid in effective stain removal.
Different Types of Stains
Stains are not all created equal. They can be broadly classified into four main types: protein-based stains, tannin-based stains, oil-based stains, and dye-based stains. Each of these categories has its unique characteristics, which can influence how easy or difficult the stain is to remove. Understanding the type of stain you're dealing with is a critical first step towards effective stain removal.
Protein-based Stains
Protein-based stains come from animal or human sources. Examples include blood, sweat, dairy products, egg, and bodily fluids. These stains are unique because they can set with heat, making them more difficult to remove. Therefore, it's important to treat protein-based stains with cold water and avoid exposing them to high temperatures until the stain has been fully removed.
Tannin-based Stains
Tannin-based stains originate from plants. Common examples include tea, coffee, wine, fruit juices, and some types of ink. Tannins are natural plant compounds that can create vibrant and often stubborn stains. They tend to be acidic, meaning that they often respond well to acidic stain removers. However, like protein-based stains, tannin-based stains can set with heat.
Oil-based Stains
Oil-based stains come from substances like cooking oil, grease, butter, makeup, and other oily products. These stains can be particularly challenging because oil doesn't mix with water, the most common stain-removing solvent. Removing oil-based stains often requires a degreasing agent, which can break down the oil and allow it to be washed away.
Dye-based Stains
Dye-based stains include things like hair dye, some inks, and paint. These stains are particularly vibrant and can be difficult to remove because they are designed to bond strongly with materials. Dye-based stains often require a two-step process for removal: loosening the dye from the material and then lifting it away.
Understanding the type of stain you're dealing with is an essential first step towards effective stain removal. In the upcoming chapters, we'll offer detailed, step-by-step instructions for dealing with each type of stain. But first, let's explore how different stains behave on various materials.
Effect of Stains on Different Materials
The type of material that a stain lands on can significantly affect the stain removal process. Different materials have unique properties that influence how they interact with stains and stain removal treatments. This section will explore the stain behavior on natural fibers versus synthetic fibers and provide insight into understanding fabric labels and their implications on stain removal.
Stain Behavior on Natural Fibers vs. Synthetic Fibers
Natural fibers, such as cotton, wool, silk, and linen, come from plants or animals. They tend to be more breathable than synthetic fibers, but they also can be more susceptible to certain types of stains. For example, protein-based stains often adhere strongly to natural fibers and can be difficult to remove if not treated promptly.
Synthetic fibers, like polyester, nylon, and acrylic, are made from man-made polymers. These materials often resist staining more effectively than natural fibers due to their smooth, nonporous surfaces. However, oil-based stains can be particularly problematic on synthetic fabrics because both the stain and the fabric derive from similar petroleum-based compounds.
Understanding Fabric Labels and Their Implications on Stain Removal
Fabric labels provide vital information about the composition of your garments, and understanding them can be key to effective stain removal. Labels typically indicate the type of fabric and provide washing instructions, which can guide your stain removal approach. For example, a garment labeled as 'dry clean only' should not be treated with water-based stain removers at home, while a garment made from a blend of cotton and polyester may require a more versatile approach to stain removal.
Special Considerations for Delicate and Special Fabrics
Delicate fabrics, such as silk, wool, cashmere, and leather, require special care when it comes to stain removal. These materials can be easily damaged by harsh stain removers or inappropriate treatment methods. When dealing with stains on these types of fabrics, it's often best to consult a professional cleaner. However, if professional cleaning is not an option, there are mild, at-home treatments that can be attempted with caution.
Understanding how different materials react with stains is crucial to successful stain removal. In the next section, we will discuss the role of heat, time, and agitation in the process of stain setting and removal.
The Role of Heat, Time, and Agitation in Stain Setting
The process of stain setting—the point at which a stain becomes difficult or impossible to remove—is influenced by several factors. Three key factors in this process are heat, time, and agitation. Each of these can play a significant role in determining whether a stain can be successfully removed.
How Heat Can Set Stains
Heat can accelerate many chemical reactions, and this applies to the bonding process between stains and materials. When a stained garment is exposed to heat—whether from hot water, a hot dryer, or even a hot day—the heat can cause the staining substance to bond more tightly with the material. This is particularly true for protein-based and tannin-based stains, which can set under heat and become much more difficult to remove.
That's why one of the first rules of stain removal is to avoid exposing a stained garment to heat until the stain is fully removed. It's generally best to treat stains with cold water and let them air dry until you're sure the stain is gone.
The Impact of Time on Stain Removal
Time is another crucial factor in stain setting. The longer a stain sits, the more time it has to bond with the material, making it harder to remove. Prompt treatment is often the key to successful stain removal. Even a few minutes can make a difference for some stains. For example, a red wine stain is much easier to remove when it's fresh than when it has had time to dry and set.
The Role of Agitation in Spreading or Setting Stains
Agitation—the process of physically disturbing the stained material—can also impact stain setting. On the one hand, gentle agitation can help to loosen a stain, making it easier to remove. On the other hand, vigorous agitation can cause a stain to spread or penetrate more deeply into the material, making it more difficult to remove. Therefore, it's generally recommended to blot a stain gently rather than rubbing or scrubbing it.
Understanding the role of heat, time, and agitation in stain setting can significantly improve your stain removal success. In the next chapter, we'll start looking at specific stain removal techniques, starting with the general principles of stain removal that apply to all types of stains.
General Principles of Stain Removal
Now that we have a solid understanding of what stains are and how they interact with different materials, it's time to learn about the general principles of stain removal. These principles form the basis of most stain removal techniques and will provide a crucial foundation for the specific techniques we'll explore in subsequent chapters.
Why Understanding General Principles is Important
Effective stain removal isn't just about knowing what to do—it's also about understanding why you're doing it. By understanding the principles behind stain removal, you'll be better equipped to tackle new or unusual stains, adapt stain removal techniques to suit different situations, and prevent stains from setting in the first place.
In this chapter, we'll cover the basic steps of stain removal, how to choose the right stain remover, safety considerations for stain removal, and tips for success. We'll provide a comprehensive overview of the key principles that apply to all types of stains and all stain removal situations. Let's get started.
The Basic Steps of Stain Removal
No matter what type of stain you're dealing with, the basic steps of stain removal tend to be the same. Following these steps can increase your chances of successfully removing a stain. Remember, not all stains can be completely removed, but prompt and appropriate treatment can often make a significant difference.
Blotting the Stain
The first step in stain removal is blotting the stain. If the stain is still wet, use a clean, dry cloth or paper towel to gently blot as much of the substance as possible. The goal is to remove excess substance without spreading the stain or pushing it deeper into the material. Remember to avoid rubbing or scrubbing, as this can cause the stain to spread or set more deeply.
Treating with a Stain Remover
Once you've blotted the stain, the next step is to treat it with a stain remover. The type of stain remover you choose will depend on several factors, including the type of stain and the type of fabric, which we'll cover in more detail in the next section. It's important to apply the stain remover correctly and to give it enough time to work before you move on to the next step.
Washing and Air Drying
After treating the stain, wash the garment as directed on its care label. It's usually best to wash in cold water, as hot water can cause some stains to set. Once the garment has been washed, let it air dry. Avoid using a dryer until you're sure the stain is gone, as the heat from the dryer can set any remaining stain, making it more difficult to remove.
Evaluating the Stain and Repeating the Process if Necessary
Once the garment is dry, check the stain area closely. If the stain is still visible, you may need to repeat the stain removal process. Sometimes, a particularly stubborn stain may require several treatments to fully remove.
Following these basic steps can help increase your success in stain removal. However, there are other factors to consider as well, such as choosing the right stain remover and taking proper safety precautions, which we'll discuss in the following sections.
Choosing the Right Stain Remover
The stain remover you choose can significantly impact your success in stain removal. There are several types of stain removers available, each designed to tackle specific types of stains. Choosing the right one involves considering factors such as the type of stain, the type of fabric, and the age of the stain.
Common Types of Stain Removers
Stain removers come in several forms, including detergents, solvents, and enzyme-based cleaners. Detergents are often effective on a wide range of stains, while solvents are particularly useful for oil-based stains. Enzyme-based cleaners are designed to break down specific types of molecules, making them highly effective on protein-based stains like blood and grass.
Considerations for Choosing a Stain Remover
When choosing a stain remover, start by considering the type of stain. As we discussed in Chapter II, different types of stains have different characteristics and require different treatment strategies. Use this information to guide your choice of stain remover. For instance, if you're dealing with an oil-based stain, a solvent-based stain remover might be your best bet.
Next, consider the type of fabric. Some stain removers are too harsh for delicate fabrics and can cause damage. Always check the garment's care label and the stain remover's instructions to ensure that they are compatible.
Finally, consider the age of the stain. Older stains can be more difficult to remove and may require a more aggressive approach. However, be careful not to damage the fabric in the process.
Testing the Stain Remover
Before applying the stain remover to the visible stain, it's a good idea to test it on an inconspicuous area of the garment first. This can help you avoid discoloring or damaging the fabric. If the fabric responds well to the stain remover in the test area, you can proceed with treating the stain.
Choosing the right stain remover is a critical step in successful stain removal. With the right knowledge and tools, you can effectively treat a variety of stains. In the next section, we'll cover some important safety considerations for using stain removers.
Safety Considerations for Stain Removal
While stain removal is often a necessary part of fabric care, it's important to remember that many stain removers contain chemicals that can be harmful if not handled correctly. Understanding and adhering to safety precautions can prevent accidents and ensure a safe stain removal process.
Reading and Following Product Instructions
Every stain remover should come with a set of instructions for its safe and effective use. These instructions can provide valuable information about how to apply the product, how long to leave it on, how to rinse it off, and what to do in case of accidental exposure or ingestion. Always read and follow these instructions carefully.
Handling and Storing Stain Removers Safely
When handling stain removers, it's a good idea to wear protective gloves to avoid skin contact. Some stain removers can cause skin irritation or other health effects on contact. Similarly, avoid inhaling the product, as this can also cause health effects. If you're working in a small or poorly ventilated space, consider wearing a mask or respirator.
Stain removers should be stored out of reach of children and pets, in a cool, dry place. Make sure the lid is tightly closed to prevent leaks and evaporation. If you're disposing of a stain remover, do so in accordance with local waste disposal regulations.
Potential Risks of Mixing Different Cleaning Products
It's important to avoid mixing different cleaning products unless the product instructions specifically say it's safe to do so. Mixing cleaning products can result in harmful chemical reactions. For instance, mixing bleach and ammonia can produce toxic gases.
In conclusion, safety is a key aspect of the stain removal process. Always take appropriate precautions when using stain removers to protect your health and safety. In the next section, we'll provide some additional tips for success in stain removal.
Tips for Success in Stain Removal
Having covered the basic steps, choosing the right stain remover, and safety considerations, let's now discuss some additional tips that can enhance your success in removing stains. Some of these may seem straightforward, but it's surprising how often they're overlooked.
The Importance of Acting Quickly
As we discussed in the previous chapter, time plays a crucial role in stain setting. The quicker you act, the better your chances of removing the stain. If you can start treating the stain within a few minutes of its occurrence, you're off to a great start. Even if you can't do a full treatment immediately, even just blotting the stain can make a big difference.
Testing Stain Removers on an Inconspicuous Area First
Before using a stain remover on a visible stain, it's wise to test it on an inconspicuous area of the fabric first. This can help prevent unexpected reactions between the fabric and the stain remover, such as discoloration or damage. If the fabric responds well in the test area, you can proceed with confidence.
Avoiding Heat Until the Stain is Fully Removed
As mentioned earlier, heat can set some stains, making them much more difficult to remove. Therefore, avoid exposing a stained item to heat until the stain is fully removed. This means washing in cold water and air drying, rather than using a hot dryer.
Knowing When to Seek Professional Help
Finally, it's important to know when to seek professional help. Some stains are simply too stubborn or delicate for home treatment. Professional cleaners have specialized knowledge and tools that can help remove these difficult stains without damaging the fabric. If you're unsure whether you can successfully remove a stain, it's often better to err on the side of caution and consult a professional.
With these tips in your stain removal toolkit, you'll be well-prepared to tackle a wide range of stains. In the following chapters, we'll delve into specific techniques for different types of stains. Armed with the principles and tips from this chapter, you'll be ready to apply those techniques effectively.
By now, you should have a thorough understanding of the general principles of stain removal. These principles serve as the foundation for all stain removal efforts, equipping you with the knowledge and skills to tackle a wide variety of stains.
We began by discussing the basic steps of stain removal, emphasizing the importance of blotting the stain, treating it with a stain remover, washing and air drying the item, and evaluating the stain. We then explored the process of choosing the right stain remover, highlighting the role of factors like the type of stain, the type of fabric, and the age of the stain in this decision.
We also covered the importance of safety in stain removal, advising you to read and follow product instructions, handle and store stain removers safely, and avoid mixing different cleaning products. Lastly, we shared additional tips for successful stain removal, including acting quickly, testing stain removers on an inconspicuous area, avoiding heat until the stain is fully removed, and knowing when to seek professional help.
In the chapters that follow, we'll dive into the specifics of removing different types of stains. While each type of stain requires a unique approach, the principles and techniques we've covered in this chapter will be applicable across the board. Armed with this knowledge, you're ready to take on any stain that comes your way.
Specific Stain Removal Techniques
Welcome to Chapter IV of our comprehensive guide to stain removal. In the previous chapters, we've covered the general principles of stain removal, including basic steps, the importance of choosing the right stain remover, safety considerations, and additional tips for success. Now, it's time to delve into the specifics of removing different types of stains.
The focus of this chapter is on the unique characteristics of various common stains, and the specific techniques needed to remove them. Each type of stain, whether it's from food, oil, protein, tannin, combination ingredients, or dirt and mud, requires a slightly different approach. And, as we've emphasized throughout this guide, using the right technique can make all the difference in successfully removing a stain.
In the sections that follow, we'll take a close look at a variety of common stains, including red wine, coffee, chocolate, grease, cooking oil, lipstick, blood, sweat, grass, tea, ink, berries, ketchup, barbecue sauce, ice cream, and dirt and mud. For each stain, we'll provide a detailed description of its characteristics and a step-by-step guide to its removal. These techniques have been tried and tested, and they represent the best practices in stain removal as of the time of writing.
Whether you're dealing with a fresh spill or an old, stubborn stain, the techniques in this chapter can help. By mastering these techniques, you'll be well-equipped to tackle almost any stain that comes your way. So let's dive in, and start transforming your stain removal skills!
Stains from Foods and Drinks
Stains from foods and drinks are among the most common types of stains. Whether it's a splash of red wine, a drip of coffee, or a smear of chocolate, these stains can be tough to remove. However, with the right techniques, you can effectively treat and eliminate these stains. Let's delve into each one.
Red Wine
Red wine is notorious for leaving stains that are difficult to remove. The pigments in red wine can deeply penetrate fabrics, making the stain resistant to many cleaning methods.
Here's a step-by-step guide to removing red wine stains:
- Blot the stain: As soon as the spill occurs, blot the stain with a clean cloth to remove as much of the wine as possible. Be careful not to rub, as this can push the wine deeper into the fabric.
- Apply salt: If the stain is still fresh, apply a thick layer of salt. The salt will absorb the wine, pulling it out of the fabric. Leave the salt on the stain for a few minutes, then brush it off.
- Treat with stain remover: Apply a stain remover that's suitable for the type of fabric and the age of the stain. Follow the instructions on the product packaging.
- Wash and air dry: Wash the stained item in cold water. Then, air dry it. Remember, avoid heat until you're sure the stain is fully removed.
Coffee
Coffee stains can be stubborn, especially if they're allowed to set. The tannins in coffee give it its color, and these can bind to the fibers of fabric, making the stain difficult to remove.
Here's a step-by-step guide to removing coffee stains:
- Blot the stain: If the spill is fresh, blot the stain with a clean cloth to remove as much of the coffee as possible.
- Rinse with cold water: Rinse the back of the stained area with cold water, pushing the coffee out of the fabric.
- Apply stain remover: Treat the stain with a stain remover that's suitable for the type of fabric. Follow the product instructions.
- Wash and air dry: Wash the item in cold water and air dry it. As with red wine stains, avoid heat until the stain is fully removed.
Chocolate
Chocolate stains are a combination stain, containing both oil and tannins. As a result, they can be quite challenging to remove.
Here's a step-by-step guide to removing chocolate stains:
- Remove excess chocolate: If there's still chocolate on the fabric, gently scrape it off with a spoon or the edge of a credit card. Be careful not to rub the chocolate into the fabric.
- Rinse with cold water: Rinse the back of the stain with cold water, helping to push the chocolate out of the fabric.
- Apply stain remover: Treat the stain with a stain remover that's suitable for the type of fabric and the nature of the stain. Follow the product instructions.
- Wash and air dry: Wash the stained item in cold water, then air dry it. As always, avoid heat until the stain is completely removed.
Remember, each of these techniques is specific to the stain it treats. While there are common elements, like blotting the stain and avoiding heat, the treatment process may differ depending on the stain. Now, let's move on to other types of stains.
Oil-Based Stains
Oil-based stains, whether from cooking oil, makeup, or motor grease, have a tendency to cling stubbornly to fabric fibers. Their greasy nature makes them resistant to water, so a more specialized approach is necessary for successful removal. Let's go over how to treat these stains effectively.
Grease or Motor Oil
Whether from a motor or a bicycle chain, oil-based stains can be quite challenging to remove. Their slick, viscous nature allows them to penetrate deeply into fabric fibers.
Here's a step-by-step guide to removing grease or motor oil stains:
- Remove excess oil: Start by blotting the stain with a clean cloth to remove any excess oil. Avoid rubbing the stain, as this could spread it further.
- Apply dish soap: Dish soap is designed to break down grease and can be very effective for treating oil-based stains. Apply a small amount of dish soap to the stain, then gently rub it in using your fingers or a soft cloth.
- Rinse with warm water: Rinse the stained area with warm water. The combination of dish soap and warm water should start to break down the oil.
- Apply stain remover and wash: If the stain is still visible, apply a stain remover that's suitable for the type of fabric and the nature of the stain, and wash the item in warm water. Air dry after washing.
Cooking Oil
Spills and splatters from cooking oil are common kitchen mishaps. These stains can set quickly and are often resistant to regular washing.
Here's a step-by-step guide to removing cooking oil stains:
- Blot the stain: If the spill is fresh, blot it with a clean cloth to absorb as much of the oil as possible.
- Apply dish soap: Cover the stain with a small amount of dish soap, then gently rub it in. As with motor oil stains, the dish soap will help break down the grease.
- Rinse and treat with stain remover: Rinse the stain with warm water, then apply a stain remover that's suitable for the fabric and the type of stain. Follow the product instructions.
- Wash and air dry: Wash the item in warm water and air dry it. Check the stain before drying, as heat can set oil stains.
Lipstick or Makeup
Lipstick and other makeup products often contain oil to enhance their texture and longevity. This makes them more likely to leave oil-based stains on fabric.
Here's a step-by-step guide to removing lipstick or makeup stains:
- Scrape off excess makeup: If there's still makeup on the fabric, use a spoon or the edge of a credit card to gently scrape it off. Be careful not to spread the stain.
- Apply makeup remover or dish soap: If you have a makeup remover that's safe for fabrics, you can use it to treat the stain. If not, dish soap can be an effective alternative. Rub the remover or dish soap gently into the stain.
- Rinse and apply stain remover: Rinse the stained area with warm water, then apply a stain remover that's suitable for the fabric and the type of stain. Follow the product instructions.
- Wash and air dry: Wash the item in warm water and air dry it. As with other oil-based stains, avoid heat until the stain is fully removed.
Mastering the techniques for removing these common oil-based stains can save you a lot of frustration. Next, let's take a look at how to handle protein-based stains.
Protein-Based Stains
Protein-based stains, such as blood, sweat, and milk, are another common type of stain that you may encounter. Due to the organic nature of these stains, they require specific treatment methods that differ from those used for food, drink, or oil-based stains. Let's dive into the specifics of removing these stains.
Blood
Blood is a protein-based stain that can be particularly tricky to remove, especially if it has dried. Immediate action is often key to preventing a permanent stain.
Here's a step-by-step guide to removing blood stains:
- Blot the stain: If the blood stain is fresh, blot it with a clean, damp cloth. Avoid rubbing, as this can push the blood deeper into the fabric.
- Soak in cold water: Soak the stained fabric in cold water for 30 minutes. Using hot water can set the blood stain, making it more difficult to remove.
- Apply stain remover: Treat the stain with a stain remover that's suitable for protein-based stains and the type of fabric. Follow the product instructions.
- Wash and air dry: Wash the item in cold water and air dry it. Always avoid heat when dealing with blood stains.
Sweat
Sweat stains can yellow over time and can also be accompanied by body oil, making them somewhat tricky to remove.
Here's a step-by-step guide to removing sweat stains:
- Pre-soak in cold water: Soak the stained garment in cold water for 30 minutes. This will help to loosen the stain.
- Apply a mixture of baking soda and water: Mix baking soda with a little water to make a paste. Apply this paste to the stain and let it sit for 20 minutes. The baking soda will help to break down the sweat and body oil.
- Rinse and apply stain remover: Rinse the stained area with cold water, then apply a stain remover that's suitable for protein-based stains. Follow the product instructions.
- Wash and air dry: Wash the item in cold water and air dry it. Check the stain before drying, as heat can set sweat stains.
Milk
Milk stains are protein-based and can become quite smelly if not treated promptly. Here's how to remove them:
- Blot the stain: If the milk stain is fresh, blot it with a clean, damp cloth. Try to absorb as much of the milk as possible.
- Rinse with cold water: Rinse the stained area with cold water. This will help to flush out some of the milk proteins.
- Apply stain remover: Treat the stain with a stain remover that's suitable for protein-based stains and the type of fabric. Follow the product instructions.
- Wash and air dry: Wash the item in cold water and air dry it. Remember, heat can set protein stains, making them more difficult to remove.
Successfully removing protein-based stains can be a challenge, but with these guides, you're well equipped to tackle them head-on. In the next section, we'll discuss techniques for removing dirt and mud stains.
Dirt and Mud Stains
Whether you're an avid gardener, a parent of active children, or just enjoy outdoor activities, dirt and mud stains are inevitable. These types of stains might seem straightforward to remove, but they can be quite stubborn, especially if they've had time to dry and set into the fabric. In this section, we'll guide you through the best practices for removing dirt and mud stains.
Dirt
Dirt stains can be a challenge to remove completely, particularly if they have been ground into the fabric. However, with the right steps, you can effectively treat and remove these stains.
Here's a step-by-step guide to removing dirt stains:
- Shake off loose dirt: Start by shaking or brushing off as much loose dirt as you can from the fabric. Avoid rubbing, as this can push the dirt deeper into the fabric.
- Rinse with cold water: Rinse the stained area with cold water from the back of the stain. This will help to push the dirt out of the fabric.
- Apply stain remover: Treat the stain with a stain remover that's suitable for the type of fabric. Follow the product instructions.
- Wash and check: Wash the item as you normally would. Before drying, check to see if the stain is gone. If not, repeat the stain removal process.
Mud
Mud stains are a combination of dirt and water, and these can be particularly stubborn, especially if the mud has dried onto the fabric.
Here's a step-by-step guide to removing mud stains:
- Let the mud dry: It might seem counterintuitive, but let the mud dry completely. Trying to wipe away wet mud can spread the stain and push it deeper into the fabric.
- Brush off dried mud: Once the mud has dried, brush or scrape off as much as you can. Again, avoid rubbing to prevent pushing the stain further into the fabric.
- Soak in cold water: Soak the stained fabric in cold water for about an hour. This will help to loosen the remaining mud particles.
- Apply stain remover and wash: Treat the stain with a stain remover that's suitable for the type of fabric, then wash the item as you normally would. Check the stain before drying, as heat can set mud stains.
With these steps, dirt and mud stains should no longer be a daunting challenge. In the following sections, we will discuss how to handle more specific and possibly more stubborn stains, such as ink and paint.
Ink and Paint Stains
Whether from a leaky pen or a creative afternoon with paint, ink and paint stains can be some of the toughest stains to tackle. They have a knack for seeping into fabric fibers and setting quickly. But don't worry! With the right techniques, you can successfully remove these types of stains. Let's dive into the specific steps needed for each.
Ink
Ink stains can be particularly frustrating due to their tendency to spread and seep into fabric fibers. The key to effectively removing these stains is to act quickly.
Here's a step-by-step guide to removing ink stains:
- Blot the stain: If the ink stain is fresh, use a clean cloth to blot as much ink as possible. Do not rub the stain, as this can cause it to spread.
- Apply rubbing alcohol: Dab a bit of rubbing alcohol onto a clean cloth and gently apply it to the stain. The alcohol can help to break down the ink.
- Rinse with cold water: Rinse the stained area with cold water. This will help to flush out some of the ink.
- Apply stain remover and wash: If the stain is still visible, apply a stain remover that's suitable for the fabric and the nature of the stain. Wash the item as per the garment care label. Always check the stain before drying, as heat can set ink stains.
Paint
Paint stains can be tricky to remove, especially if the paint has had time to dry. However, the type of paint (oil-based, water-based) will determine the best removal method.
Here's a step-by-step guide to removing water-based paint stains:
- Blot the stain: If the paint is still wet, use a clean cloth to blot as much paint as possible. Avoid rubbing to prevent spreading the stain.
- Rinse with warm water: Rinse the stained area with warm water, flushing out as much paint as possible.
- Apply dish soap: Dish soap can help to break down water-based paints. Apply a small amount to the stain, then gently rub it in.
- Rinse, apply stain remover, and wash: Rinse the stain with warm water, then apply a stain remover that's suitable for the fabric and the type of stain. Wash the item as per the garment care label, and air dry.
For oil-based paint stains, you will need a paint thinner or turpentine to break down the paint. Remember to always test these products on an inconspicuous area of the fabric first to ensure they don't damage the material.
With the right approach and a bit of patience, ink and paint stains can be effectively removed. In the next section, we'll discuss how to tackle beverage stains, from coffee and tea to red wine.
Tannin-Based Stains
Tannin-based stains come from substances like coffee, tea, red wine, and some fruits and vegetables. They are known for their stubbornness, due largely to the natural tannins these items contain, which bind strongly with other substances and are difficult to break down. But with the right approach, even these challenging stains can be effectively treated.
Tea
Like coffee, tea contains tannins that can create a difficult-to-remove stain. Here's how to tackle tea stains:
- Blot the stain: If the tea stain is fresh, blot up as much of the liquid as possible with a clean, dry cloth.
- Rinse with cold water: Rinse the back of the stain with cold water. This helps to flush out some of the tea.
- Apply stain remover: Treat the stain with a stain remover that's suitable for tannin stains and the fabric type. Follow the product instructions.
- Wash and air dry: Wash the item as usual and air dry it. As with other tannin stains, avoid heat until the stain is fully removed.
Berries
Berries, including blueberries, strawberries, raspberries, and others, are delicious, but they can leave behind stubborn stains due to their vibrant pigments and tannins. However, these stains can be treated effectively with the right approach.
Here's a step-by-step guide to removing berry stains:
- Remove excess: If the berry stain is fresh, gently remove any excess berry material from the fabric. Be careful not to rub or smear the stain, as this can push it deeper into the fibers.
- Rinse with cold water: Rinse the back of the stain with cold water, which can help push out some of the berry juice.
- Apply a mixture of vinegar and dish soap: A solution of one part white vinegar and one part dish soap can be effective against berry stains. Apply the mixture to the stain and let it sit for a few minutes.
- Rinse and check: Rinse the stained area again with cold water. If the stain is still present, repeat the previous step.
- Wash and air dry: Wash the item as usual, then air dry. As with other tannin stains, avoid heat until you're sure the stain is gone, as it can set the stain.
Berry stains can be stubborn due to their high tannin content and strong pigments, but with the right treatment, they can be effectively removed. In the next section, we'll tackle yet another type of challenging stain: oil and grease stains.
Combination Stains
Combination stains are those that are made up of more than one type of substance. These can be particularly tricky to remove because they often require multiple methods of treatment. These types of stains are commonly found in food spills that contain multiple ingredients, such as spaghetti sauce, barbecue sauce, and makeup, among others. Here we will discuss some of the most common combination stains and the best practices for removing them.
Spaghetti Sauce
Spaghetti sauce is a common source of combination stains, as it contains oil, pigment, and sometimes proteins from meat. Here's how to handle this type of stain:
- Remove excess: First, gently remove any excess sauce from the fabric, being careful not to rub or smear the stain.
- Treat the oil component: Apply a small amount of a grease-fighting dish soap to the stain to break down the oil.
- Treat the pigment component: Rinse the stained area with cold water, then apply a stain remover suitable for the fabric and type of stain. Follow the product's instructions.
- Wash and check: Wash the item as usual, then check the stain. If it is still visible, repeat the previous steps before drying the garment, as heat can set the stain.
Barbecue Sauce
Like spaghetti sauce, barbecue sauce is a combination stain that requires a specific treatment approach. Here's how to do it:
- Remove excess: Remove any excess sauce from the fabric, being careful not to rub it in further.
- Treat the oil component: Apply a small amount of a grease-fighting dish soap to the stain.
- Treat the pigment component: Rinse the stained area with cold water, then apply a stain remover suitable for the fabric and type of stain. Follow the product's instructions.
- Wash and check: Wash the item as usual, then check the stain. If it is still visible, repeat the previous steps before drying the garment, as heat can set the stain.
Ketchup
Ketchup stains can be particularly stubborn due to their bright red color and the combination of oil and tomato-based pigments. Here's a step-by-step guide to removing ketchup stains:
- Remove excess: First, remove any excess ketchup from the fabric, being careful not to smear it further into the fabric.
- Treat the oil component: Apply a small amount of a grease-fighting dish soap to the stain.
- Treat the pigment component: Rinse the stained area with cold water, then apply a stain remover suitable for the fabric and type of stain. Follow the product's instructions.
- Wash and check: Wash the item as usual, then check the stain. If it is still visible, repeat the previous steps before drying the garment, as heat can set the stain.
While combination stains can be challenging to remove, breaking down the process and treating each component of the stain separately can lead to successful results. In the next section, we'll move on to treating stains caused by natural bodily functions, such as sweat and blood.
In this chapter we have delved into the world of specific stain removal techniques, providing step-by-step guides for tackling a wide array of common and not-so-common stains. From protein-based stains like milk and egg to combination stains such as spaghetti sauce and makeup, we have covered a comprehensive range of techniques to aid you in your stain-removal endeavors.
Each stain type presents its own unique challenge, but with patience, prompt action, and the right cleaning approach, most stains can be successfully removed. The key is to identify the type of stain you're dealing with and apply the correct method accordingly. For some stains, this might mean treating multiple components separately, as is the case with combination stains.
In the following chapter, we'll delve into the world of 'hard-to-treat' stains. These are the stains that require a bit more elbow grease and perhaps some specialty products. These include stains like ink, rust, mildew, and others. With the foundations you've built in understanding the nature of stains and the principles of stain removal, you're now well equipped to tackle even the most stubborn stains.
Remember, stain removal is often as much an art as it is a science, and while the strategies outlined in this guide provide a solid starting point, you may need to adapt and experiment depending on the specific circumstances. Don't get discouraged if a stain doesn't lift immediately; persistence often pays off in the world of stain removal.
Professional Stain Removal
Throughout the previous chapters of this guide, we've walked through a wide array of techniques for treating a variety of stains at home. However, some stains may prove to be too stubborn or complex to handle without expert help. This is where professional stain removal comes into play. Whether it's a priceless heirloom, an important piece of furniture, or simply a favorite garment that's been compromised, professional stain removal services can provide an invaluable lifeline.
Professional stain removers possess extensive knowledge and experience, as well as access to commercial-grade cleaning agents and equipment. These tools and skills often make them the best bet for successfully removing difficult stains without causing damage to the item in question. They are adept at handling all types of stains, from simple food stains to more complex and resistant stains such as ink, red wine, rust, and others.
In this chapter, we will explore the world of professional stain removal in greater detail. We will discuss the types of professional stain removal services available, what the process of working with a professional typically looks like, and how much these services tend to cost. We will also provide tips for effectively communicating with professionals and for maintaining your items post-professional cleaning. And, finally, we will discuss some alternative solutions, such as renting professional-grade cleaning equipment or using commercial stain removal products at home.
Professional stain removal may not be necessary for every situation, but understanding when and how to make use of these services can make all the difference when faced with a particularly challenging stain. Let's dive in and explore the options available to you.
Types of Professional Stain Removal Services
There are several types of professional stain removal services available, each offering different specializations and advantages. Understanding these can help you make an informed decision about the best service for your particular situation. Let's explore these in detail.
Dry Cleaning
Dry cleaning is a commonly used professional service that is excellent for treating stains on delicate fabrics that might be damaged by water and traditional detergents. Contrary to its name, dry cleaning isn't completely dry; it uses a liquid solvent other than water to clean fabrics.
Dry cleaners are experts in treating a variety of stains, and their solvents can often tackle stains that are difficult to remove with water-based methods. These professionals have access to commercial-grade cleaning agents and specialized equipment, enabling them to treat stubborn stains effectively without harming the fabric.
Specialized Stain Removal Companies
Some companies specialize solely in stain removal. They typically handle a wide array of stains and materials, from clothing and upholstery to carpets and rugs. These professionals use a variety of methods and tools, including solvents, steam cleaners, and power washers, among others.
Specialized stain removal companies are usually a good choice for particularly stubborn stains, large items like carpets and furniture, or items with sentimental or monetary value that you don't want to risk damaging.
Carpet and Upholstery Cleaning Services
As the name suggests, carpet and upholstery cleaning services specialize in cleaning carpets, rugs, sofas, armchairs, and other upholstered furniture. These professionals use a variety of methods, such as hot water extraction, dry cleaning, and steam cleaning, to treat stains and deep clean these items.
These services are often necessary for large or stubborn stains on carpets and upholstery, especially in cases where the item is too large or heavy to clean thoroughly with at-home methods.
Professional Laundry Services
Professional laundry services go beyond basic washing and drying. They offer a range of services, including spot treatment for stains, professional-grade washing, and specialized services like starching and pressing.
While you might use a laundry service for your regular washing needs, these professionals can also be a great resource for dealing with difficult stains, particularly on everyday items like clothing and bed linens.
In summary, the type of professional stain removal service that's best for your situation will depend on the type of item, the nature of the stain, and the resources at your disposal. Next, we'll explore how to work with these professionals to get the best results.
Working with Professional Stain Removers
Choosing to enlist the help of a professional stain remover is only the first step. It's also important to understand how to work effectively with these professionals to ensure the best possible results. This section will guide you through the process of finding a reputable stain removal service, what to expect during the service, and tips for communicating effectively with professionals.
Finding a Reputable Stain Removal Service
Not all stain removal services are created equal. Finding a reputable service is crucial to ensuring your items are treated properly and that the stain is effectively removed. Here are some tips to help you find a reliable service:
- Check reviews and ratings: Look for online reviews and ratings of the service. These can often provide insights into the quality of their work and their customer service.
- Ask for recommendations: Word-of-mouth can be a powerful tool. Ask friends, family, or colleagues if they have any recommendations. You can also ask local businesses, such as furniture or clothing stores, for their recommended services.
- Verify credentials and experience: Check the service's credentials and experience. How long have they been in business? Do they specialize in certain types of stains or items? Do they have any professional certifications?
What to Expect During the Process
The process of professional stain removal will vary depending on the service and the type of item and stain, but here is a general idea of what to expect:
- Initial consultation: The professional will likely want to see the stained item and discuss the nature of the stain. They will evaluate the stain, the type of fabric, and discuss the best treatment approach.
- Stain treatment: The professional will then treat the stain, often in a specialized facility with commercial-grade equipment and cleaning agents. This may involve several steps and multiple treatments.
- Review of results: Once the treatment is complete, the professional will review the results with you. They should provide you with information about how to care for the item post-treatment.
Tips for Communicating Effectively with Professionals
Communication is key to ensuring a successful outcome. Here are some tips for effective communication:
- Provide as much information as possible: Let the professional know as much as you can about the stain – what caused it, how long it's been there, and any treatments you've already attempted. This will help them choose the most effective treatment method.
- Ask questions: Don't be afraid to ask questions. It's important to understand the process and what to expect.
- Express your expectations and concerns: Be clear about what you hope to achieve and any concerns you have. This could include concerns about potential damage to the item or about the use of certain chemicals, for example.
Working with professional stain removers can be a great solution for dealing with stubborn or complex stains. With the right approach and effective communication, you can ensure a successful outcome and breathe new life into your stained items.
Cost of Professional Stain Removal
While professional stain removal can be a powerful solution for stubborn stains, it's important to consider the cost involved. This section will provide a breakdown of the factors that influence the cost of professional stain removal, how to obtain a quote, and some general estimates for common services.
Factors Affecting the Cost
Several factors can influence the cost of professional stain removal services, including:
- Type of Stain: The nature of the stain can greatly affect the cost. Some stains are more difficult to remove and require more specialized treatment, which can increase the cost.
- Type of Material: Different materials require different cleaning methods. Some materials, like silk or wool, may require more specialized and therefore more expensive methods.
- Size of the Stain and Item: Larger stains or items will typically cost more to clean due to the increased time and materials needed.
- Service Type: Different types of services have different costs. For example, a specialized stain removal service might charge more than a general dry cleaning service.
How to Get a Quote
Most professional stain removal services will provide a quote before starting work. Here's how to get one:
- Initial Consultation: The service will typically want to examine the item and stain before providing a quote. This allows them to evaluate the complexity of the job and estimate the cost accurately.
- Ask for a Written Quote: Always ask for a written quote that includes the cost of all services. This will help avoid any surprise costs later on.
Average Cost for Common Services
While costs can vary widely depending on the factors discussed above, here are some rough estimates for common services:
- Dry Cleaning: This service usually costs between $10-$50 per item, depending on the item and stain complexity.
- Carpet Cleaning: Professional carpet cleaning can range from $100-$200 for a single room, but this can vary depending on the size of the room and stain severity.
- Specialized Stain Removal: These services can be more costly, with prices ranging from $50-$200 or more depending on the stain and item.
While the cost of professional stain removal may seem high compared to DIY methods, remember that professionals have access to specialized tools and expertise that can save valuable items and prevent further damage. The value of a successfully cleaned item often outweighs the cost of the service.
Do's and Don'ts of Professional Stain Removal
Engaging a professional stain removal service can be a significant step, especially when dealing with valuable or sentimental items. Understanding the do's and don'ts of professional stain removal can help ensure you get the most from your service while also safeguarding your items. Let's delve into some key points to remember during this process.
Do's
- Do provide as much information as possible: The more the professionals know about the stain (what caused it, how long it's been there, any previous attempts at removal), the better they can formulate a strategy for removal.
- Do follow care instructions post-treatment: After the treatment, the professionals will likely give you care instructions for the item. Following these instructions can help maintain the results and prevent further staining.
- Do check credentials and reviews: Always verify the credentials of the service and check for reviews and ratings online before handing over your items. This can give you a better idea of their reliability and effectiveness.
- Do ask for a quote upfront: To avoid any surprise costs, it's a good idea to ask for an upfront quote that includes all services.
Don'ts
- Don't withhold information: Withholding information about the stain can lead to less effective treatment and even potential damage to the item. Always be upfront and honest about the stain.
- Don't ignore professional advice: If the professional advises against certain cleaning methods or warns about potential risks, it's important to take this advice seriously. They have the expertise and experience to know what's best for your item.
- Don't delay treatment: The longer a stain sits, the harder it is to remove. If you're unable to remove a stain yourself, don't hesitate to contact a professional as soon as possible.
In summary, being informed, proactive, and communicative are key aspects of successfully working with professional stain removal services. By following these do's and don'ts, you can make the most of your service and ensure the best possible outcome for your stained items.
When to Choose Professional Stain Removal
One of the most important decisions in stain removal is when to turn to professionals. While many stains can be effectively treated at home, there are situations where professional stain removal is the best or only option. This section will explore the different scenarios where professional intervention is advisable, the benefits of professional services, and considerations when making this decision.
Scenarios for Professional Intervention
Here are some situations where you might want to consider professional stain removal:
- Persistent Stains: If a stain persists despite your best efforts at home, it might be time to call in the professionals. They have specialized tools and techniques that can tackle stubborn stains.
- Delicate or Valuable Items: For items that are delicate, antique, or of significant monetary or sentimental value, it's often best to entrust their care to professionals to avoid unintentional damage.
- Large or Complex Stains: If a stain is particularly large, or if it's a combination stain that involves multiple types of substances, a professional service can be more effective.
Benefits of Professional Services
Professional stain removal services offer several benefits, including:
- Expert Knowledge: Professionals have in-depth knowledge of different types of stains and materials, and they know the most effective treatment methods.
- Specialized Tools and Techniques: Professional services have access to tools and techniques that aren't typically available for home use, allowing them to remove stains more effectively.
- Time and Effort Saving: Treating stains can be time-consuming and labor-intensive. Hiring a professional service can save you time and effort.
Considerations in Choosing Professional Services
When deciding whether to choose professional stain removal, consider the following:
- Cost: While professional services can be more effective, they're also more expensive. Consider whether the cost is worth it for the particular item and stain.
- Risks: There are always risks involved in stain removal, especially with delicate or valuable items. Professionals will usually do their best to mitigate these risks, but it's important to understand them.
- Results: Consider the potential results. A professional service may be able to restore your item to like-new condition, but in some cases, a stain may only be lightened, not completely removed.
Deciding to opt for professional stain removal involves a careful evaluation of the stain, the item, the potential benefits, and the costs and risks. When done correctly and in the right situations, professional stain removal can be a powerful tool in maintaining and preserving your belongings.
Alternative Solutions to Professional Stain Removal
While professional stain removal services provide expertise and resources, they might not always be the most viable or economical option. In this section, we explore alternative solutions to professional stain removal, including renting professional-grade cleaning equipment, using professional-grade stain removal products at home, and understanding when it's best to DIY or call a professional.
Renting Professional-Grade Cleaning Equipment
One possible alternative is to rent professional-grade cleaning equipment. These powerful machines can often be rented from home improvement or appliance stores, and they provide a level of stain-fighting power that regular household tools can't match. Here are some points to consider:
- Cost-Effectiveness: Renting equipment can often be more cost-effective than hiring a professional service, especially for larger jobs like carpet or upholstery cleaning.
- Availability: Check with local stores for availability and rental policies. Make sure to reserve your machine in advance, especially during high-demand periods.
- Instruction: Make sure you understand how to use the equipment before you rent. Improper use can lead to less effective cleaning or even damage to your items.
Using Professional-Grade Stain Removal Products at Home
Another alternative is to use professional-grade stain removal products at home. These products are generally stronger and more effective than regular consumer-grade products. Here's what to keep in mind:
- Effectiveness: Professional-grade products can be highly effective at removing tough stains. They often contain stronger ingredients or unique formulas that can tackle stubborn stains.
- Safety: Due to their strength, these products should be used with care. Always follow the manufacturer's instructions and safety guidelines, and use in a well-ventilated area.
- Cost: While these products are generally more expensive than regular stain removers, they may still be more cost-effective than hiring a professional service.
When to DIY vs. When to Call a Professional
The decision between tackling a stain yourself or calling a professional often comes down to the specifics of the situation. Here are some considerations:
- Stain Type: Certain types of stains, like oil-based or tannin-based stains, can be particularly difficult to remove and may benefit from professional treatment.
- Material: Delicate, rare, or valuable materials are generally best left to professionals to avoid unintentional damage.
- Cost and Time: While DIY methods can save money, they also require time and effort. Consider your own resources and the value of the item in question.
Professional stain removal isn't the only solution for tough stains. With careful consideration and the right resources, you can tackle many common stains yourself. However, understanding the limits of these alternatives and when to call in a professional is key to successful stain removal.
Understanding the realm of professional stain removal and its alternatives is key to making informed decisions when facing stubborn stains. From recognizing the scenarios in which professional intervention is advisable, understanding the do's and don'ts when engaging professional services, to exploring DIY methods and resources, this chapter has provided a comprehensive overview to help you navigate your stain removal journey.
Professional services bring with them a wealth of knowledge and specialized tools that can tackle a wide variety of stains, from the common to the complex. However, they also involve cost considerations and potential risks. In some cases, renting professional-grade cleaning equipment or using professional-grade stain removal products at home may be a more viable solution, particularly for those on a tight budget or dealing with larger-scale tasks.
The choice between DIY methods and professional services ultimately depends on the nature of the stain, the value and material of the stained item, and the resources at your disposal. By weighing these factors and utilizing the advice presented in this guide, you can choose the best course of action for your particular situation.
As we move forward in this guide, remember that stain removal is as much an art as it is a science. It requires patience, persistence, and adaptability. Whether you're tackling the task yourself or seeking help from professionals, the most important thing is to stay informed and open to learning. With knowledge and practice, you can become a master of stain removal in your own right.
Preventing Stains
The old adage, "Prevention is better than cure," holds true in the realm of stain removal. No matter how skilled you become at treating and removing stains, it's always easier and more efficient to prevent them from happening in the first place. This chapter will provide you with a comprehensive guide on how to prevent stains, helping you save time, effort, and potentially, your favorite possessions.
In this chapter, we will delve into the science of stains, exploring how and why they occur. We will also discuss practical preventive measures that you can take to minimize the occurrence of common types of stains, such as those from food, drink, ink, dirt, and oil. The goal is not just to equip you with strategies to ward off stains, but to help you understand the rationale behind these strategies.
Further, we will introduce you to various protective products available in the market, from fabric protectors and sealants to stain-repellent clothing and fabrics. These products can serve as additional defenses against stains, offering extra layers of protection for your materials.
We will also offer advice on how to prevent stains in various settings, whether you're at home, at work, or enjoying the great outdoors. Each setting comes with its unique stain challenges, and having context-specific strategies can be invaluable.
By the end of this chapter, you should have a deeper understanding of how to prevent stains and feel confident about implementing these preventive measures in your daily life. Remember, effective stain prevention doesn't just preserve the cleanliness and longevity of your belongings—it can also provide peace of mind and free up more of your time to enjoy life's pleasures without worry.
Preventive Measures for Common Types of Stains
Everyday life presents a myriad of opportunities for potential stains, but understanding how to navigate these situations can significantly reduce your risk. In this section, we'll delve into practical preventive measures for some of the most common types of stains, including those caused by food and drink, ink, dirt and mud, and oil and grease.
Food and Drink
Food and drink stains are some of the most common household stains. Here are some preventive measures:
- Mindful Eating: Be aware of your actions while eating. Try to avoid eating on the couch or while moving around to reduce the chance of spillage.
- Use of Napkins and Tablecloths: Use napkins while eating, and protect your table surfaces with tablecloths. This can help catch any spills and prevent stains on clothing and furniture.
Ink
Ink stains can be a nightmare to remove. Here are a few preventive tips:
- Careful Handling of Pens and Markers: Make sure pen caps are on when not in use and avoid leaving pens in places where they can leak, such as in pockets or on couches.
- Use of Washable Inks: When possible, opt for washable inks which are easier to remove from most materials.
Dirt and Mud
Dirt and mud stains are inevitable, especially in certain outdoor activities. Here are ways to mitigate them:
- Regular Cleaning: Regularly clean high-traffic areas to prevent accumulation of dirt that could lead to stains.
- Use of Mats and Removing Shoes Indoors: Place mats at entrances and encourage the removal of shoes when entering the house to minimize the amount of dirt brought indoors.
Oil and Grease
Oil and grease stains can be tricky to remove. Here's how to prevent them:
- Proper Handling and Storage of Oily Substances: Be mindful when handling oily substances. Store them properly to prevent spillage and potential stains.
- Use of Protective Gear: Use aprons, gloves, and other protective gear when working with oil or grease to prevent stains on your clothing.
By taking these preventive measures, you can significantly reduce the occurrence of common types of stains, keeping your belongings in better condition and minimizing your need for stain removal efforts.
Protective Products
While adopting mindful practices can go a long way in preventing stains, sometimes we need a little extra protection. This is where protective products come into play. These products are designed to provide an additional layer of defense against stains, helping to keep your items clean and in good condition.
Fabric Protectors and Sealants
Fabric protectors and sealants are sprays or liquids that can be applied to various materials to create a protective barrier against stains. Here are some key points about these products:
- How They Work: These products work by creating a barrier on the surface of the material. This barrier repels liquids and prevents them from penetrating the material, thus reducing the likelihood of stains.
- Application: Application methods vary by product, but typically involve spraying the product evenly over the material and allowing it to dry.
- Considerations: It's important to note that while fabric protectors and sealants can provide additional protection against stains, they are not foolproof. Some stains may still occur, particularly with heavy or prolonged exposure to staining agents. Furthermore, some products may not be suitable for all materials. Always read the product instructions and perform a patch test before full application.
Stain-Repellent Clothing and Fabrics
Stain-repellent clothing and fabrics have been treated with special technologies to resist stains. Here's what you should know about them:
- How They Work: These items are treated with technologies that repel liquids and resist stains. Some treatments work by reducing the surface tension of the fabric, causing liquids to bead up and roll off instead of soaking in.
- Uses: Stain-repellent clothing and fabrics are used in a variety of items, from clothing and linens to upholstery and rugs.
- Considerations: While stain-repellent items can be a great help in preventing stains, they are not completely stain-proof. Some substances may still cause stains, and the stain-repellency may diminish over time, particularly with regular washing or exposure to heat. Always follow care instructions to maintain the longevity of these items.
By incorporating the use of protective products into your stain prevention strategy, you can enhance your defenses against stains and further safeguard your belongings from potential damage.
Stain Prevention in Different Settings
Understanding that different settings pose unique stain challenges is crucial in your stain prevention strategy. Whether you're at home, at work, or outdoors, specific tactics can be applied to mitigate the risk of stains.
Home
The home is a common site for a variety of stains. Here are some tips for each room:
- Kitchen: Use cutting boards and mats when preparing food to catch spills and drips. Clean up spills immediately.
- Dining Room: Utilize tablecloths, placemats, and coasters during meals. Teach children to eat and drink carefully.
- Living Room: Avoid eating on the couch, use coasters for drinks, and consider using rugs that can be easily cleaned or replaced.
- Bedroom: Encourage kids not to eat or drink in their rooms. Consider mattress protectors to safeguard against potential spills.
Work
Stain prevention strategies at work will depend on your specific industry. Here are some general tips:
- Office: Keep food and drinks away from electronics and important documents. Use desk mats for added protection.
- Industrial: Use appropriate personal protective equipment to shield your clothing. Follow all safety protocols.
- Art-related: Use smocks, aprons, or old clothing when working with paints or dyes. Cover work surfaces for easy clean-up.
Outdoor
Outdoor activities and events can pose unique stain challenges. Here are some prevention strategies:
- Picnics/BBQs: Use tablecloths and napkins. Be mindful of food and drink placement to avoid spills.
- Sports/Physical Activities: Wear appropriate attire that can withstand dirt and sweat. Avoid sitting or laying on grass or dirt.
By adopting these strategies and adjusting them to fit your specific needs and circumstances, you can effectively prevent stains across a range of settings.
Teaching Kids About Stain Prevention
Stain prevention is not just for adults - it's also an important lesson for children. Teaching kids about stain prevention from a young age can help them develop good habits and an understanding of how their actions can impact their surroundings. Here are some tips to guide your stain prevention lessons with kids.
Start with the Basics
Begin with simple concepts. Explain what stains are and how they can affect items in the house. Discuss common sources of stains that they encounter in their daily lives, such as food, drinks, art supplies, and outdoor dirt and mud.
Demonstrate Stain Prevention Strategies
Show kids how they can prevent stains in their daily activities. This could involve demonstrating careful eating and drinking, proper use of art supplies, and the importance of taking off shoes when entering the house. Make these demonstrations fun and interactive to engage their interest.
Involve Kids in Clean-Up
While the goal is to prevent stains, spills and accidents will inevitably happen, especially with kids. When these incidents occur, involve children in the clean-up process. This helps them understand the consequences of spills and the work involved in stain removal. Plus, it provides an opportunity to discuss how the spill could have been avoided.
Reinforce Lessons Regularly
Stain prevention is a continual learning process. Regularly reinforce lessons and provide gentle reminders about stain prevention strategies. Praise kids when they successfully avoid potential spills or remember to follow prevention practices.
By teaching kids about stain prevention, you're equipping them with useful life skills, contributing to the cleanliness and preservation of your home, and possibly saving yourself from some tough stain removal tasks down the line.
Stain prevention is indeed a multi-faceted strategy, requiring knowledge, attentiveness, and proactive measures. From understanding the properties of different materials, employing mindful practices, utilizing protective products, to adapting tactics according to settings and even teaching the next generation about stain prevention, we have covered a broad spectrum of strategies to help you safeguard your belongings from stains.
The goal of this chapter and indeed this entire guide, is not to ensure a stain-free life – that would be an unrealistic expectation. Instead, we aim to empower you with the knowledge and tools you need to significantly reduce the likelihood of stains and, in case they do occur, to tackle them effectively.
By incorporating these preventative strategies into your routine, you will not only protect your cherished belongings, but also save yourself the time and stress that often comes with stain removal. After all, prevention is often much easier than the cure. As the old saying goes, "An ounce of prevention is worth a pound of cure."
So, as you go about your daily activities, remember to keep these strategies in mind. Your clothes, furnishings, and other cherished items will surely thank you. And who knows? You might just find yourself becoming the go-to stain prevention guru among your friends and family!
Stain Removal for Special Materials
One size rarely fits all when it comes to stain removal, and this is especially true when dealing with different types of materials. Some materials have unique properties that can make them more susceptible to certain types of stains, or more vulnerable to damage from certain cleaning methods. As such, stain removal is not just about knowing how to treat the stain, but also understanding the material on which the stain has occurred.
In this chapter, we will dive deep into the world of special materials - from the luxurious like leather and silk, to the everyday such as wool and microfiber, and even the delicate like lace and satin. Each of these materials requires specific attention and care when it comes to stain removal. Recognizing this, we've dedicated this chapter to offering targeted advice for dealing with stains on these special materials.
We'll explore the properties and characteristics of each material, common stains they're likely to encounter, and provide expert recommendations on how to handle these stains. Moreover, we will offer guidance on the best cleaning products to use for each material, as well as tips to maintain their quality and extend their lifespan.
The goal of this chapter is to equip you with the knowledge and confidence to tackle stains on a variety of special materials, while ensuring the preservation and longevity of your cherished items. Let's embark on this journey towards becoming a master of stain removal for special materials!
Leather
Leather, with its rich texture and durability, is a popular material for furniture, clothing, and accessories. However, it's also a porous material that can absorb stains quickly, making prompt stain removal essential. Let's explore the peculiarities of leather and the best ways to address common stains on this material.
Properties and Characteristics of Leather
Leather is a natural material, known for its strength, resilience, and distinctive feel. However, it's also porous and sensitive to certain chemicals, which can lead to discoloration or damage. Hence, it requires specific cleaning techniques to maintain its look and feel.
Common Stains on Leather and Their Treatments
Leather can be prone to a variety of stains, including oil-based stains (from food, cosmetics), dye transfer (from jeans, newspaper), and water stains. Here are some general tips for each:
- Oil-based stains: These can often be treated with a clean, dry cloth to blot the stain, followed by a specific leather cleaner.
- Dye transfer: This is best treated with a leather-specific cleaning product designed to lift dye without damaging the leather.
- Water stains: Water stains can often be treated by dampening the entire area with a sponge to avoid a ring forming, and then allowing the leather to dry naturally.
Special Leather Cleaning Products and Their Usage
There is a wide range of products designed specifically for cleaning leather. These include leather cleaners, conditioners, and protectors. Using these products as per their instructions can not only help in stain removal but also in maintaining the beauty and longevity of your leather items.
However, always do a spot test with any new product before applying it to the entire item. And remember, when in doubt, it's best to seek the advice of a professional.
Silk
Silk, known for its smooth texture and lustrous appearance, is often used in garments, bedding, and other fine items. While beautiful and luxurious, silk is delicate and can be easily damaged if not properly cared for. Understanding the unique characteristics of silk and how to treat stains on it can help preserve its beauty for years to come.
Properties and Characteristics of Silk
Silk is a protein-based fiber known for its smoothness, lustre, and drape. It's breathable, hypoallergenic, and warm in cold weather. However, silk is delicate and can be easily damaged by heat, light, and aggressive cleaning methods. Its water sensitivity can lead to water stains, and its color can be affected by exposure to alcohol and alkaline substances, such as soap and detergents.
Common Stains on Silk and Their Treatments
Common stains on silk include oil-based stains, such as those from food or makeup, and water-based stains, like sweat or beverages. Here are some general recommendations for each:
- Oil-based stains: Treat these by gently applying talcum powder to absorb the oil, and then brushing it away. Be careful not to rub or scrub the silk.
- Water-based stains: These can be more challenging due to the water sensitivity of silk. For minor stains, dabbing with a moistened cloth can sometimes help. Do not rub the stain.
Remember that silk should never be exposed to harsh chemicals or bleach. When in doubt, it's best to take silk items to a professional dry cleaner.
Precautions When Cleaning Silk
Always check the care label before cleaning silk items. Some silk items are washable, while others require professional dry cleaning. Never use hot water or a dryer with silk, as heat can shrink and damage the fabric. If hand washing is permitted, use a pH-neutral soap and lukewarm water, and gently swish the silk item in the water without wringing or rubbing it.
When drying, lay the item flat on a clean towel and roll it up to absorb the excess water. Unroll and leave the item to air dry away from sunlight. Once dry, silk should be ironed on the reverse side at a low setting while slightly damp to restore its smoothness and sheen.
Wool
Wool is a warm, resilient, and versatile material widely used in clothing, rugs, and upholstery. While wool is known for its durability, it also requires special care to keep it looking its best, especially when it comes to stain removal. Let's delve into the world of wool and learn how to effectively handle stains on this material.
Properties and Characteristics of Wool
Wool is a natural fiber derived from sheep. It's prized for its warmth, resilience, and moisture-wicking properties. Wool fibers have a unique scaly surface which can trap dirt and stains, making them sometimes challenging to remove. Wool is also sensitive to heat and agitation, and can shrink or felt if not handled correctly.
Common Stains on Wool and Their Treatments
Some common stains on wool include food, drink, and oil-based stains. Here are some general recommendations:
- Food and drink stains: Blot the stain immediately, then gently apply a wool-safe cleaner with a sponge. Rinse with lukewarm water and absorb as much moisture as possible with a towel. Allow the item to air dry away from heat.
- Oil-based stains: Similar to silk, you can apply talcum powder to absorb the oil, then gently brush it off. If the stain persists, use a wool-safe cleaner.
Guidance on Wool-Specific Cleaning Products
Many cleaning products are safe for wool, but always check the label to be sure. Wool-safe products should be gentle, pH-neutral, and free of bleach. Some wool items may be washable, while others require professional cleaning. Always check the care instructions for your specific item.
For washable wool items, use lukewarm water and avoid excessive agitation to prevent shrinkage and felting. Rinse thoroughly, as residual soap can attract more dirt. Gently squeeze out excess water without wringing, then lay the item flat to dry. To restore the item's shape, it can be steamed lightly or ironed on a low setting with a pressing cloth.
Microfiber
Microfiber, with its resilience and comfort, has become a popular choice for upholstery, clothing, and cleaning cloths. While it's known for its ability to resist staining, certain types of stains can still prove challenging. Understanding how to properly treat stains on microfiber can extend the life of your items and keep them looking fresh and clean.
Properties and Characteristics of Microfiber
Microfiber is a synthetic material typically made from polyesters, polyamides, or a blend of these. As the name suggests, the fibers are very fine, which gives microfiber its soft and plush texture. This fineness also enables microfiber to resist staining to some extent, as the tight weave of the fibers can prevent stains from penetrating deeply.
Common Stains on Microfiber and Their Treatments
Though microfiber can resist many stains, it can still be vulnerable to oil-based stains, such as those from food or cosmetics. Here are some general recommendations:
- Oil-based stains: Blot the stain immediately with a clean, dry cloth. Then, apply a small amount of dish soap or laundry detergent to the stain and gently rub with a soft sponge. Rinse the area with a damp cloth and let it dry naturally.
- Other stains: Most other stains can be treated by blotting with a damp cloth. If the stain persists, use a mild soap or a cleaner specifically designed for microfiber.
Precautions When Cleaning Microfiber
Always check the cleaning code on your microfiber item before cleaning. Some microfiber can be cleaned with water (W code), others with a solvent (S code), and some with either (S/W code). Always do a spot test before applying any cleaner to a large area. Lastly, to keep your microfiber items looking their best, vacuum regularly to remove dust and prevent buildup.
Suede
Suede, with its soft, napped finish, is a popular choice for clothing, shoes, and upholstery. While suede's unique texture adds beauty and warmth to any item, it also presents special challenges when it comes to stain removal. Understanding how to properly treat stains on suede is vital to maintaining its soft, velvety appearance.
Properties and Characteristics of Suede
Suede is a type of leather with a napped finish, usually made from the underside of animal skin, making it softer and more pliable than standard leather. However, these qualities also make suede more susceptible to damage and staining. The porous surface of suede readily absorbs liquids, making prompt stain removal essential.
Common Stains on Suede and Their Treatments
Common stains on suede include water, ink, and oil-based stains. Here are some general recommendations:
- Water-based stains: Blot the stain immediately with a clean, dry cloth. For more persistent stains, consider using a suede cleaning kit which often contains a special eraser and brush.
- Ink stains: These can be particularly tricky on suede. A professional cleaning may be required, but a home remedy involves carefully applying rubbing alcohol or vinegar with a cotton swab, followed by a treatment with a suede brush.
- Oil-based stains: Apply cornstarch or talcum powder to the stain to absorb the oil. Let it sit for several hours or overnight, then gently brush off the powder. If the stain persists, a suede cleaning kit or professional cleaning might be necessary.
Precautions When Cleaning Suede
Before attempting to clean a stain, always check the manufacturer's care instructions and perform a spot test on a small, inconspicuous area. Avoid getting suede excessively wet and never use a traditional leather cleaner on suede, as it can darken the material. After cleaning, you can use a suede brush to restore the nap of the fabric.
Regularly brushing suede can help maintain its texture and appearance, and using a suede protector spray can provide a barrier against staining. However, for significant or hard-to-remove stains, it may be best to consult a professional to avoid potentially damaging this delicate material.
Here we provided you with comprehensive information about treating stains on different types of materials. Always remember that when it comes to stain removal, prompt action is often key. The sooner you can treat a stain, the better chance you have of completely removing it.
Also, keep in mind that each material has its unique characteristics and therefore requires different care and stain removal methods. Always adhere to the manufacturer's cleaning instructions and perform a spot test before applying any cleaning solution to a larger area.
While DIY methods can be very effective for treating common stains, some situations may call for professional help. Don't hesitate to seek professional advice or services if you are dealing with a large, stubborn, or delicate stain. Professionals have access to specialized tools and solutions and are trained to handle a variety of stain removal scenarios without damaging the material.
Finally, prevention is always better than cure. Regular care and maintenance, using protective sprays or treatments, and exercising a bit of caution can go a long way in preventing stains in the first place.
Armed with the knowledge from this guide, you are now well-prepared to deal with a variety of stain situations. Happy cleaning!
Conclusion
As we wrap up this comprehensive guide, we hope that you now feel more confident in tackling a variety of stains that might occur in your daily life. Stain removal is more than just a casual wipe and clean; it's a science that combines knowledge of different types of stains, their properties, and the most effective methods to treat them.
From simple water-based stains to stubborn oil-based stains, from regular cotton and linen to special materials like silk, leather, and suede, our aim was to equip you with the knowledge and techniques to effectively deal with any stain scenario.
The core principles to remember are:
- Quick Response: Time is often of the essence when it comes to stain removal. The quicker you treat a stain, the higher the chance of successful removal.
- Understanding the Stain: Different stains have different properties and, therefore, require different treatments. Knowing the type of stain can help you choose the best treatment method.
- Understanding the Material: Different materials react differently to cleaning solutions and techniques. Always check the care label and use cleaning methods suitable for the material.
- Spot Test: Always test any cleaning solution or method on a small, hidden area first to ensure it does not cause discoloration or damage.
- Professional Help: Some stains may be too tough or too risky to remove at home, especially on delicate or expensive materials. Don't hesitate to seek professional help when needed.
- Prevention is Better than Cure: Regular maintenance, protective treatments, and immediate action can prevent many stains from setting in the first place.
We trust that with this guide, stain removal will no longer be a source of stress. Instead, it can be a testament to your care and respect for your belongings, your home, and your environment. While it may not be possible to avoid all stains, armed with the right knowledge, you're well-prepared to face any stain that comes your way.
Remember, the goal isn't perfection, but improvement and preservation. So, here's to a cleaner, brighter future. Happy cleaning!
Appendix A: Quick Stain Removal Chart
A quick reference chart to help you decide on the best approach for common stains.
| Type of Stain | Recommended Treatment |
|---|---|
| Wine | Blot, apply salt, rinse with cold water, apply stain remover, wash normally. |
| Ink | Apply rubbing alcohol, blot, rinse, apply stain remover, wash normally. |
| Grease/Oil | Apply dish soap, let sit, rinse with hot water, apply stain remover, wash normally. |
| Coffee | Rinse with cold water, apply stain remover, wash normally. |
| Blood | Rinse with cold water, apply hydrogen peroxide or stain remover, wash normally. |
| Chocolate | Scrape off excess, apply dish soap, rinse with cold water, apply stain remover, wash normally. |
| Grass | Pre-soak in cold water, apply stain remover, wash normally. |
| Tomato Sauce | Rinse with cold water, apply dish soap, rinse again, apply stain remover, wash normally. |
| Berries | Rinse with cold water, apply vinegar or lemon juice, rinse again, apply stain remover, wash normally. |
| Lipstick | Blot, apply rubbing alcohol, blot again, rinse, apply stain remover, wash normally. |
| Mud | Let dry and brush off excess, rinse with cold water, apply dish soap, rinse again, apply stain remover, wash normally. |
| Red Sauce | Scrape off excess, rinse with cold water, apply dish soap, rinse again, apply stain remover, wash normally. |
Appendix B: DIY Stain Removal Solutions
Recipes for homemade stain removal solutions using common household items.
- Vinegar Solution: Mix 1 part white vinegar with 2 parts water. Good for removing light mold and mildew stains, coffee stains, and freshening up colors.
- Baking Soda Paste: Mix baking soda with a little water to form a paste. Effective on organic stains like coffee, tea, and wine.
- Dish Soap Solution: Mix a few drops of dish soap with warm water. Ideal for oil and grease stains.
- Hydrogen Peroxide Solution: Mix equal parts of hydrogen peroxide and water. Good for blood and red wine stains. Test on a small, hidden area first as it may bleach some fabrics.
- Salt Solution: Dissolve 4 tablespoons of salt in 1 liter of water. Good for fresh red wine and blood stains.
- Lemon Juice Solution: Squeeze the juice of one lemon into a cup of water. Effective against some fruit and berry stains. Always rinse thoroughly after use to avoid potential bleaching effect.
- Enzyme-Based Laundry Detergent Solution: Mix a small amount of enzyme-based laundry detergent with water. Works well on protein-based stains such as blood, sweat, and grass.
Appendix C: Professional Stain Removal Services
A list of professional stain removal services. Note: This list is for reference only and does not constitute an endorsement.
Expert Cleaners
Let proffesionals clean your clothing
Detailed Inspection
Pockets, stains, clothing labels
Cleaning Rewards
Earn rewards on every order
Pick-up & Delivery
Fast pick-up and delivery to your home